Amazon Simple Storage Service, also known as Amazon S3, is an affordable cloud-based data storage option to use to store your WordPress website backups using BackupBuddy (affiliate). If you’re on a shared hosting account it is against the Terms of Service (TOS) to store backups on your shared hosting due to shared resources limitations and the hosting company is well within their rights to shut down your site; that is where Amazon S3 comes in. Good shared hosting is very common and sufficient for most websites that don’t need a Dedicated Server solution, which can cost $80+ a month.
Amazon S3 can also be used to back up your important business files, and you have the option to keep them private or make them accessible to the public; but that is a topic for another post!
“As part of the AWS Free Usage Tier, you can get started with Amazon S3 for free. Upon sign-up, new AWS customers receive 5 GB of Amazon S3 storage, 20,000 Get Requests, 2,000 Put Requests, and 15GB of data transfer out each month for one year.” After the year, Amazon will charge you but their prices are very affordable.
You’ll need a credit card to sign up. Let’s begin!
 Sign-up Process
1. Sign in to your existing Amazon account, or sign up for Amazon Web Services and follow the on-screen instructions.
2. Look for Amazon Simple Storage Service in the list and click it and then click “Sign up for this Web Service” and follow the on-screen instructions.
3. You’ll be asked to verify your account by automated phone call and enter the 4-digit code shown on the sign-up screen.
 You’ll then see the following screen:

Within a few minutes you’ll receive your “AWS Unified Registrati
4. You’re ready to start using your Amazon S3 account!
Start Using Your S3 Account
Let’s create a place to save our BackupBuddy (BUB) backups.
1. Sign in to your Amazon S3 console at https://console.aws.amazon.com/s3.
2. Next we’ll create a “Bucket” to hold/store your data; in this case, we’ll set up a Bucket for our BackupBuddy backups.
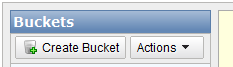
3. Click “Create Bucket.”
 In the pop-up screen, enter a name for your Bucket. Each Bucket must have a unique name not used by other Amazon S3 users and must start with a number or letter. Bucket names can contain lowercase letters, numbers, periods (.), underscores (_), and dashes (-).
Tip: Use your company’s initials as the first letters for your Bucket name. Select your region from the drop-down list. Choose a region to optimize latency, minimize costs (when your free one year is up) and/or address regulatory requirements.
Click “Create.” Your empty Bucket will appear in your Buckets panel.

Connecting BackupBuddy with Amazon S3
 1. First you’ll need your AWS Access Identifiers (your Access Key ID and Secret Access Key) and keep them in a safe place.
 In the upper right-hand corner of your screen, hover over your name. Click “Security Credentials.” For security purposes, you’ll be asked to sign in again to your account. Midway down the page you’ll see your credentials.
Copy and paste your Access Key ID into a text file. To view your Secret Access Key, click on Show. Copy and paste your Secret Access Key into a text file and save it temporarily to your desktop.

2. Log into your website. Click BackupBuddy/Settings. Scroll to the bottom of the settings page and click the “Manage Remote Destinations & Archives” button.
3. Click on the Amazon S3 tab and then “Add New Destination” and enter the information in the fields. Click “Test Settings.”
4. Under BackupBuddy/Scheduling, click Add New Schedule button, fill in the appropriate fields.

 Click on the “Add Remote Destination” button. Click the link to select Amazon S3 as the backup destination.
5. To test your new setup, do a forced backup. BackupBuddy/Backup, then choose Complete Backup. In a few minutes log back into your Amazon S3 account and your backup will appear in its Bucket.
6. Congratulations, you now have peace of mind that your website is backed up, secure and saved. BackupBuddy is a must-have for your WordPress website. Back up your entire WordPress install. Widgets/widget settings, themes, plugins, and SQL database – the entire package! It also has Malware Scanner included free from security pros, Sucuri. If you’ve ever had your site hacked or somehow “gone,” you’ll be glad you invested in yourself and your website purchasing BackupBuddy and Amazon S3.
Tip: Freeware file managers allow you to easily work with your S3 account to upload files, documents, videos etc., if you choose to store other items on your Amazon S3 account: CloudBerry Amazon S3 Explorer for Windows users and DragonDisk for Mac and Window users.
You can also view Amazon’s “Get Started with Amazon Simple Storage” for an overview.
I hope you’ve found this tutorial helpful. If you did, please leave a comment or just say “hi.”